Read The Road: Bike Sign and Signal Basics
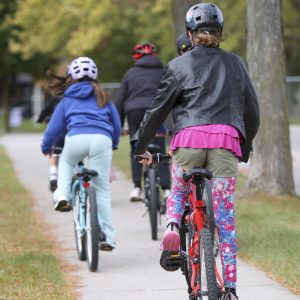
When riding a bike, you share the road with drivers, pedestrians, and other cyclists. Using hand signals lets others know what you are about to do, helping prevent confusion and accidents. Signalling clearly and early is an important part of safe cycling.
Bike Signals
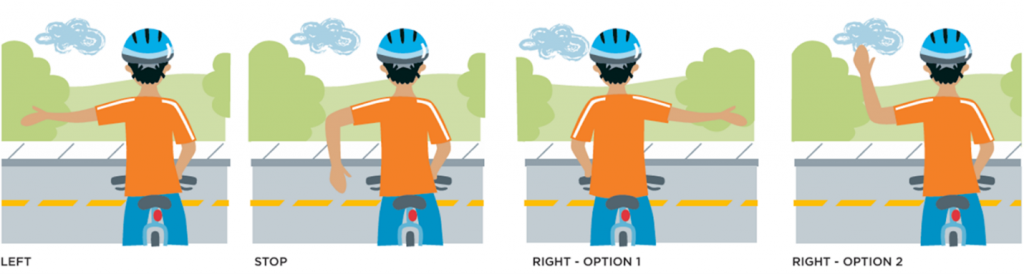
Cyclists use hand signals to show where they are going:
- Left Turn: Left arm straight out
- Right Turn: Right arm straight out or left arm bent upward
- Stop: Left arm bent downward
These signals help drivers and others understand your movements and keep everyone safe.
Resources
Read the Road Lesson Plan
This lesson helps students build bicycle and road safety knowledge. Students learn basic rules of the road, how to recognize common road signs, and practice how to signal to drivers when turning.
Read the Road PowerPoint Presentation
The PowerPoint teaches many of the common road signs that someone may see while cycling and how to navigate them. It also introduces the proper hand signals used on a bicycle to communicate safely with others on the road.
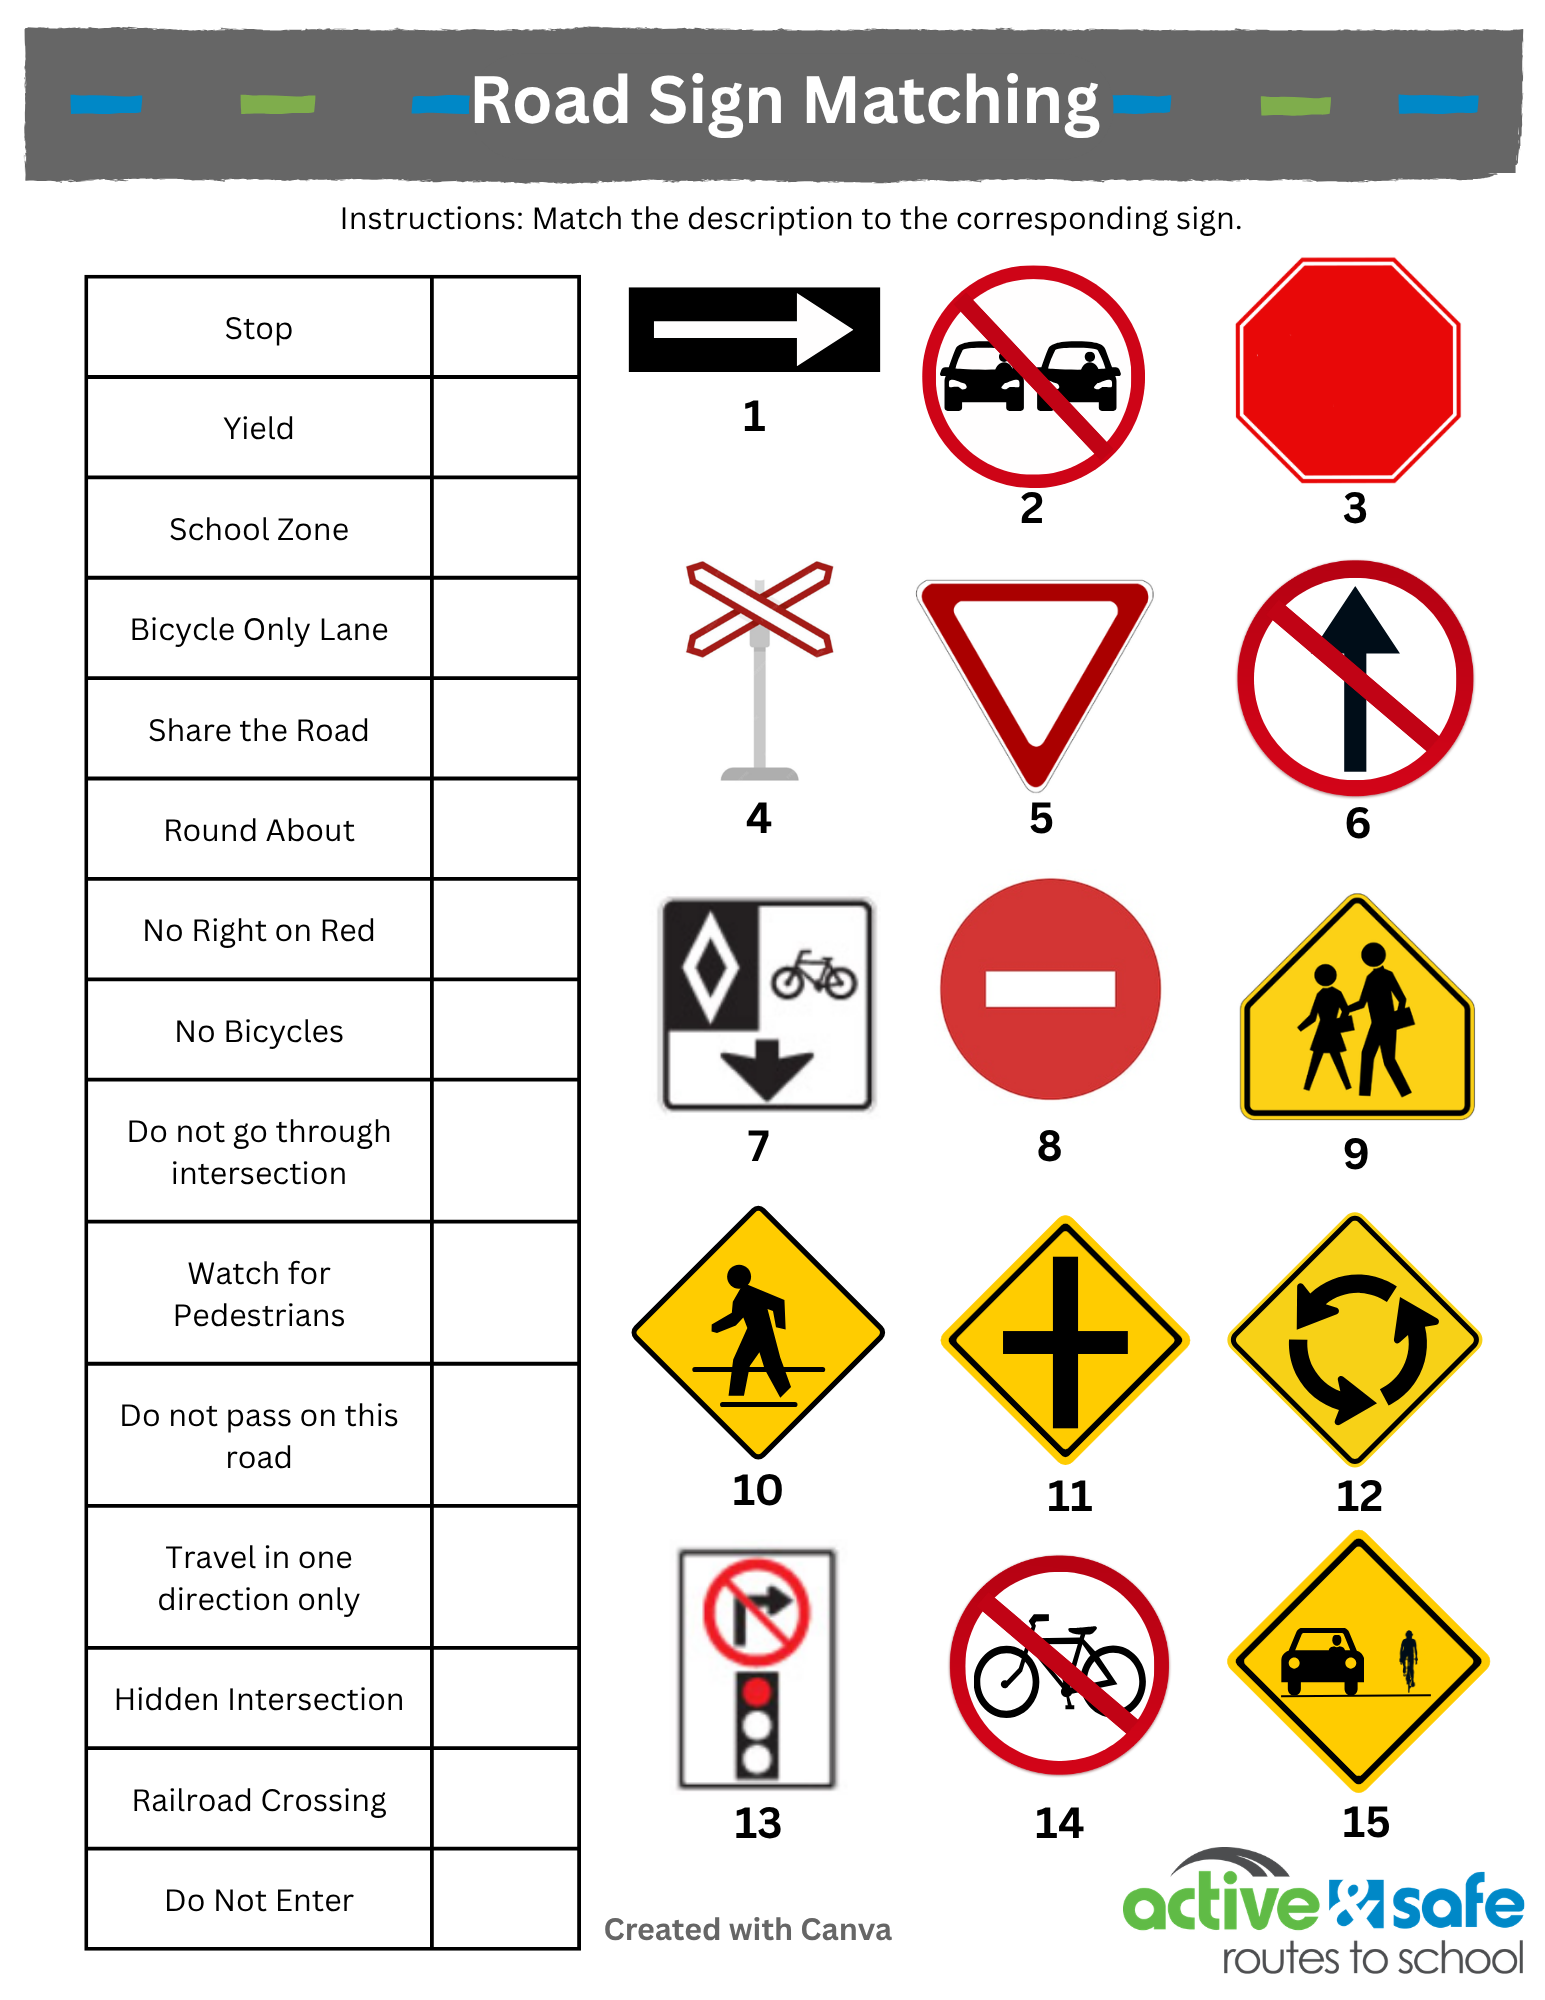
Road Sign Matching Activity Worksheet
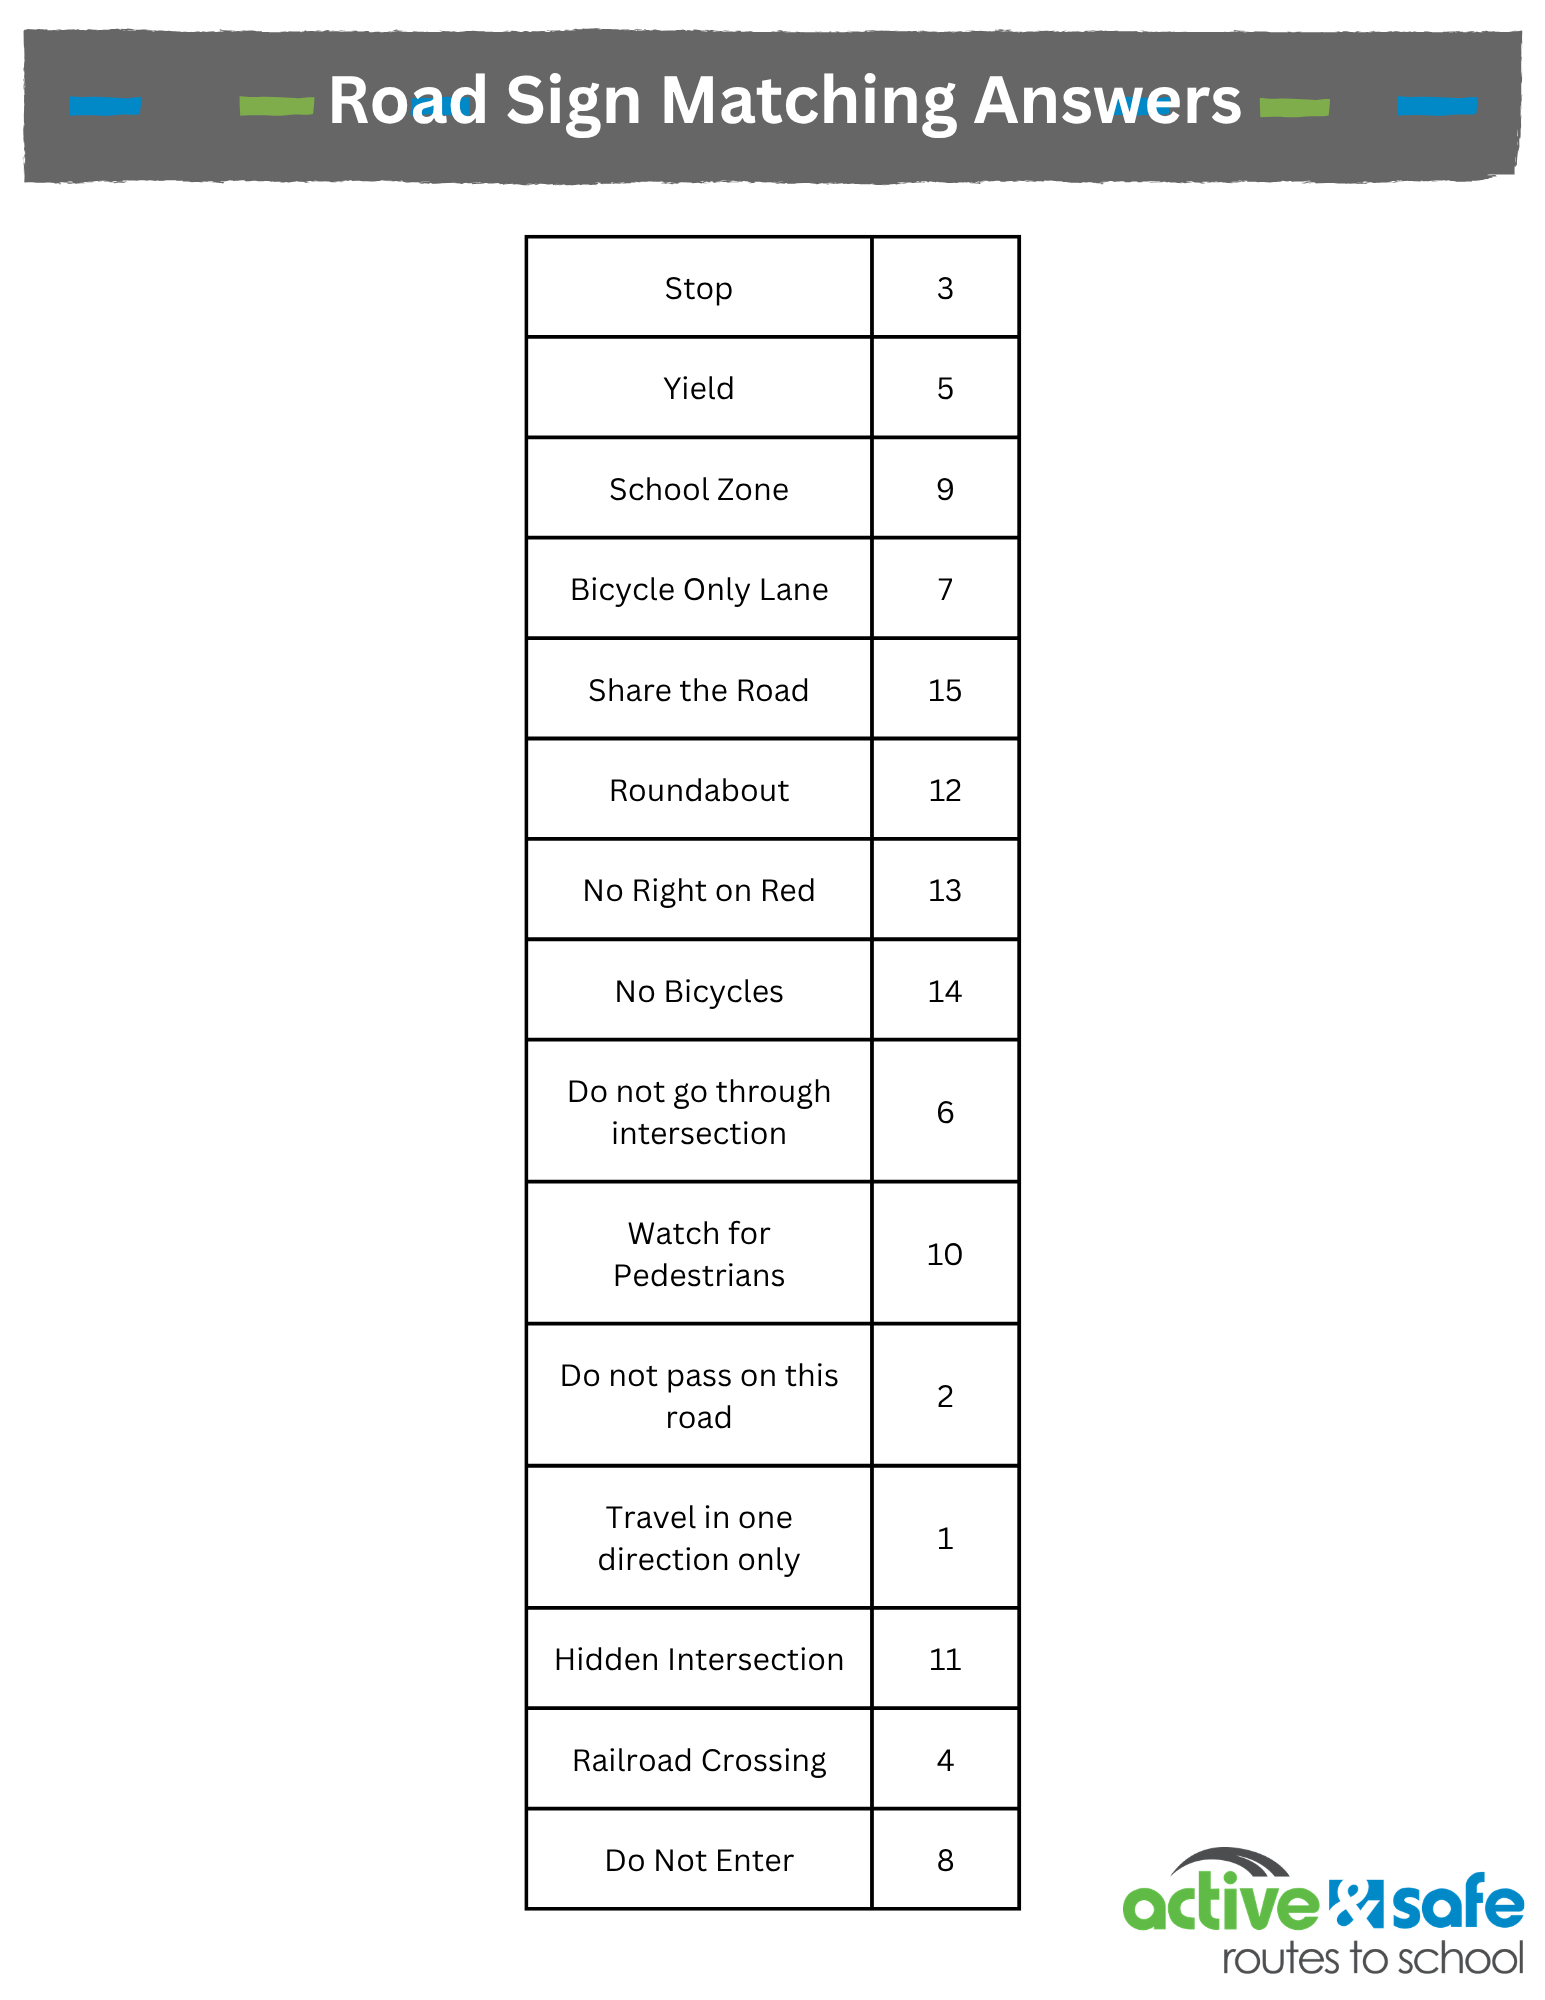
These activities support the Bike Sign Basics lesson by helping students learn how to communicate safely while riding. Students first complete a Road Sign Matching worksheet to build understanding of common cycling signs and their meanings. | Road Sign Worksheet Answers
Signal Simulation Activity
Students then participate in the “Signal Simulation” activity, where they follow a short riding scenario and demonstrate the correct hand signals for turns and stops. This helps students practice both sign recognition and signaling while building confidence and safety awareness.
Rules of the Road Video
Learn how to ride your bike safely on the road by following the same rules as other vehicles. This video shows how to read signs and signals, use hand signals to communicate your turns, and check for traffic around you. You’ll also learn how to ride in the right place on the road and stay aware of cars and obstacles—helping you ride safely and confidently.
Social Media Resource
Post this social media content about turn signals and signs on road to share with parents what your students are learning!
Bicycle Anatomy and Fit
Understanding the parts of a bicycle and how it should fit your body helps you ride safely and comfortably. A bicycle is made up of many parts that work together to help you move, steer, and stop. When a bike fits properly, it is easier to control, more comfortable to ride, and reduces the risk of injury.
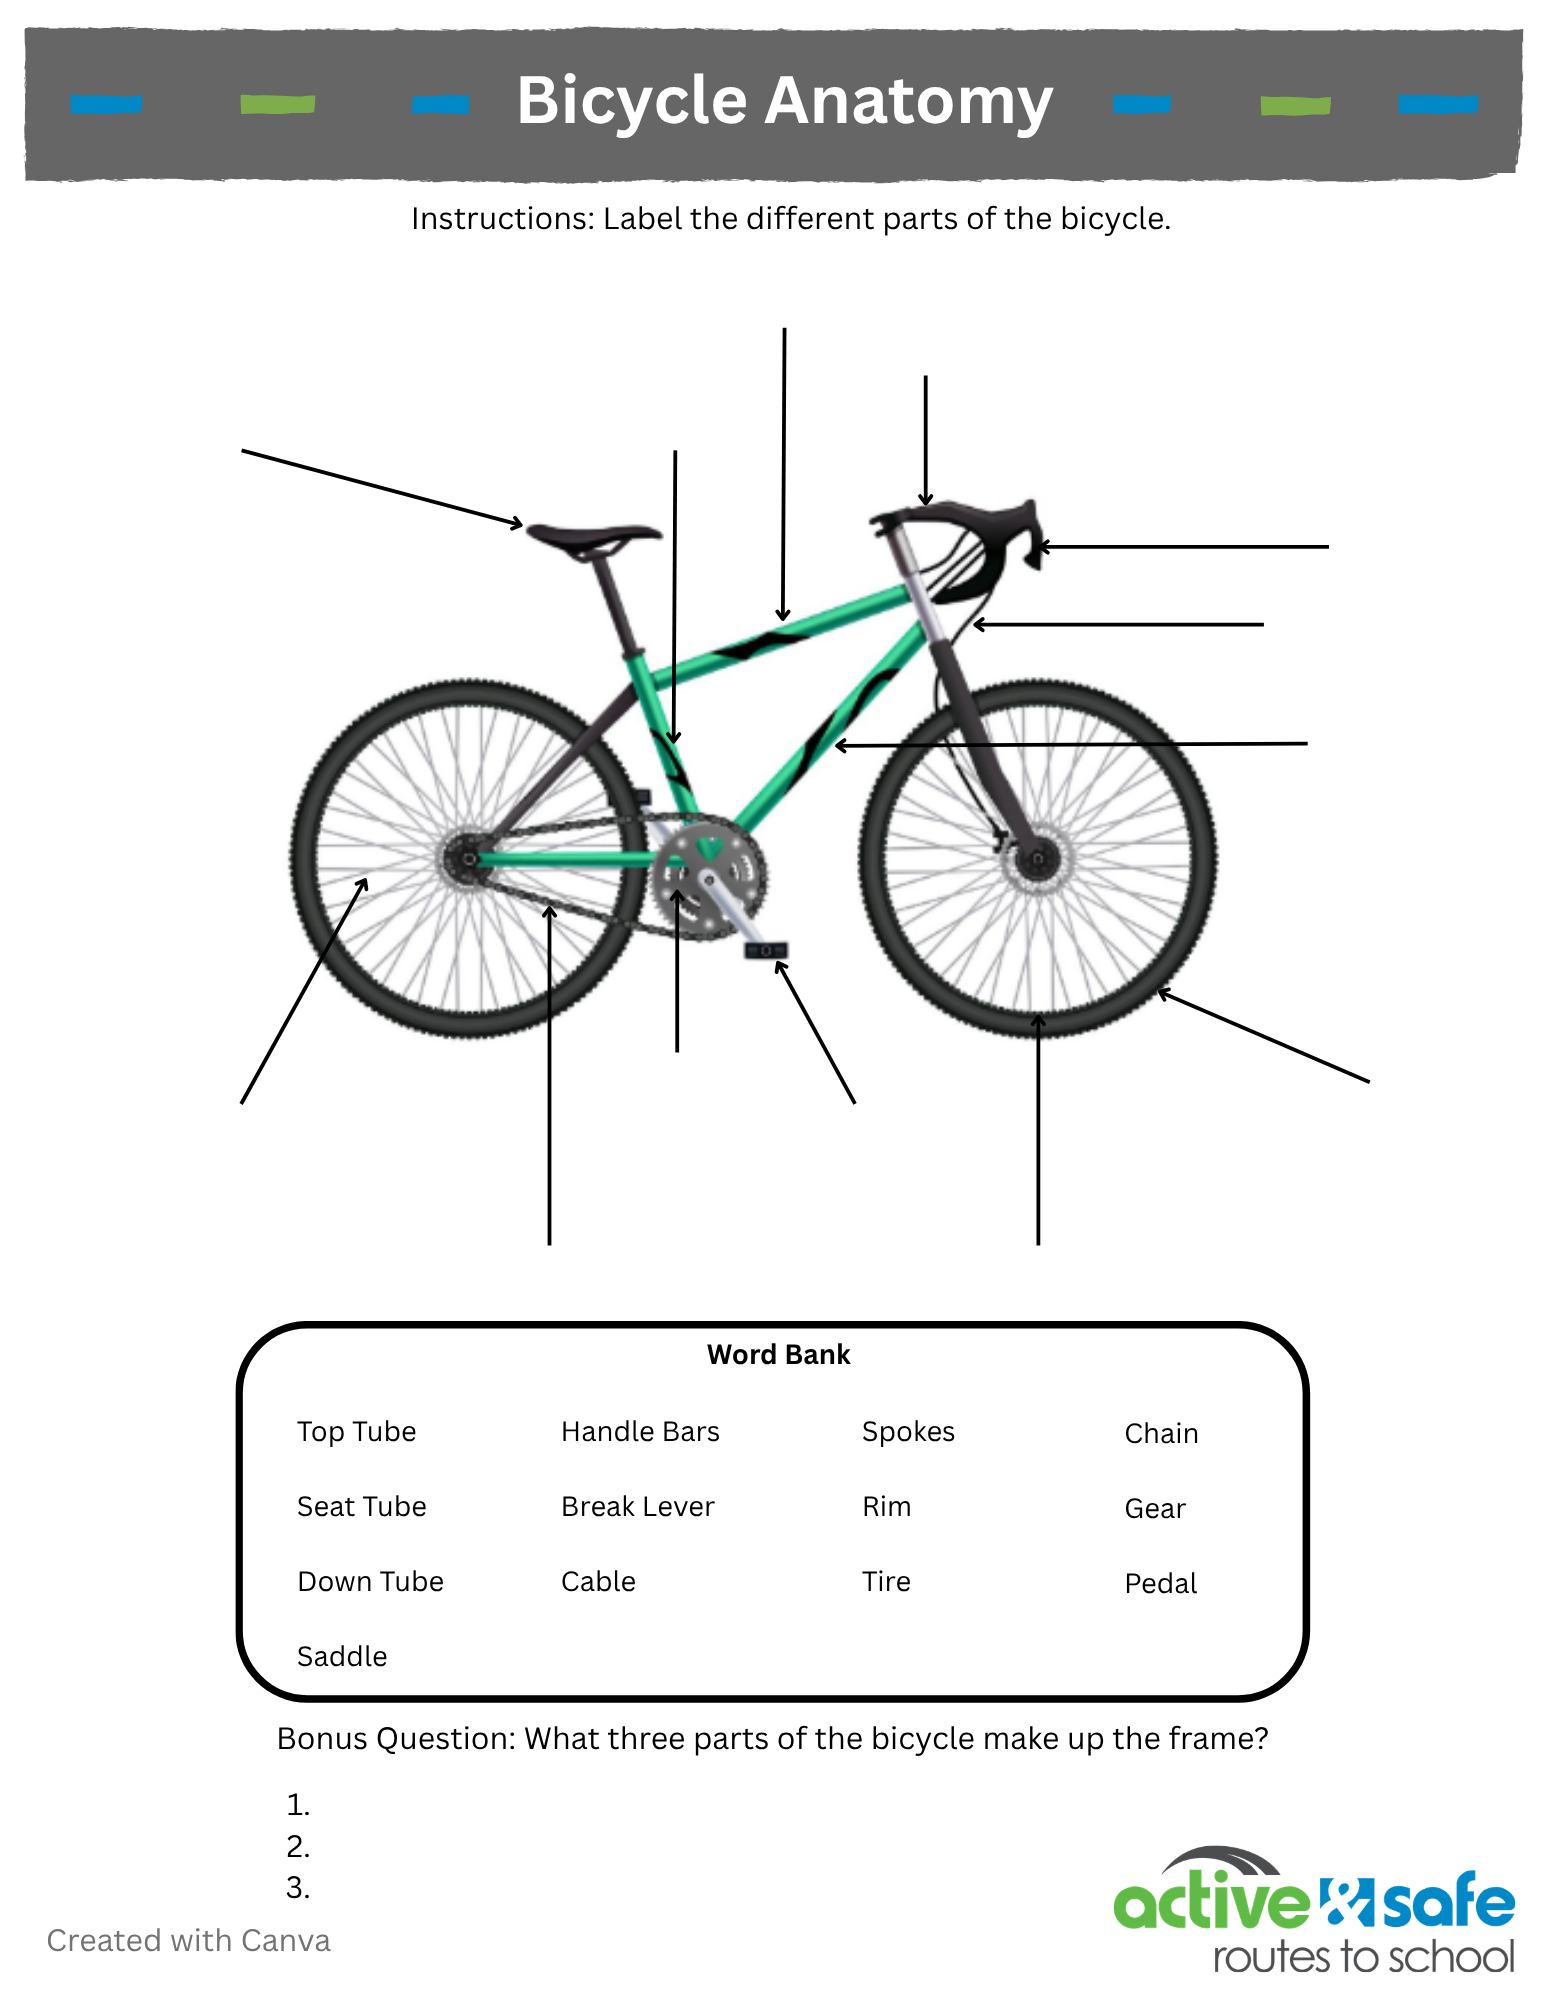
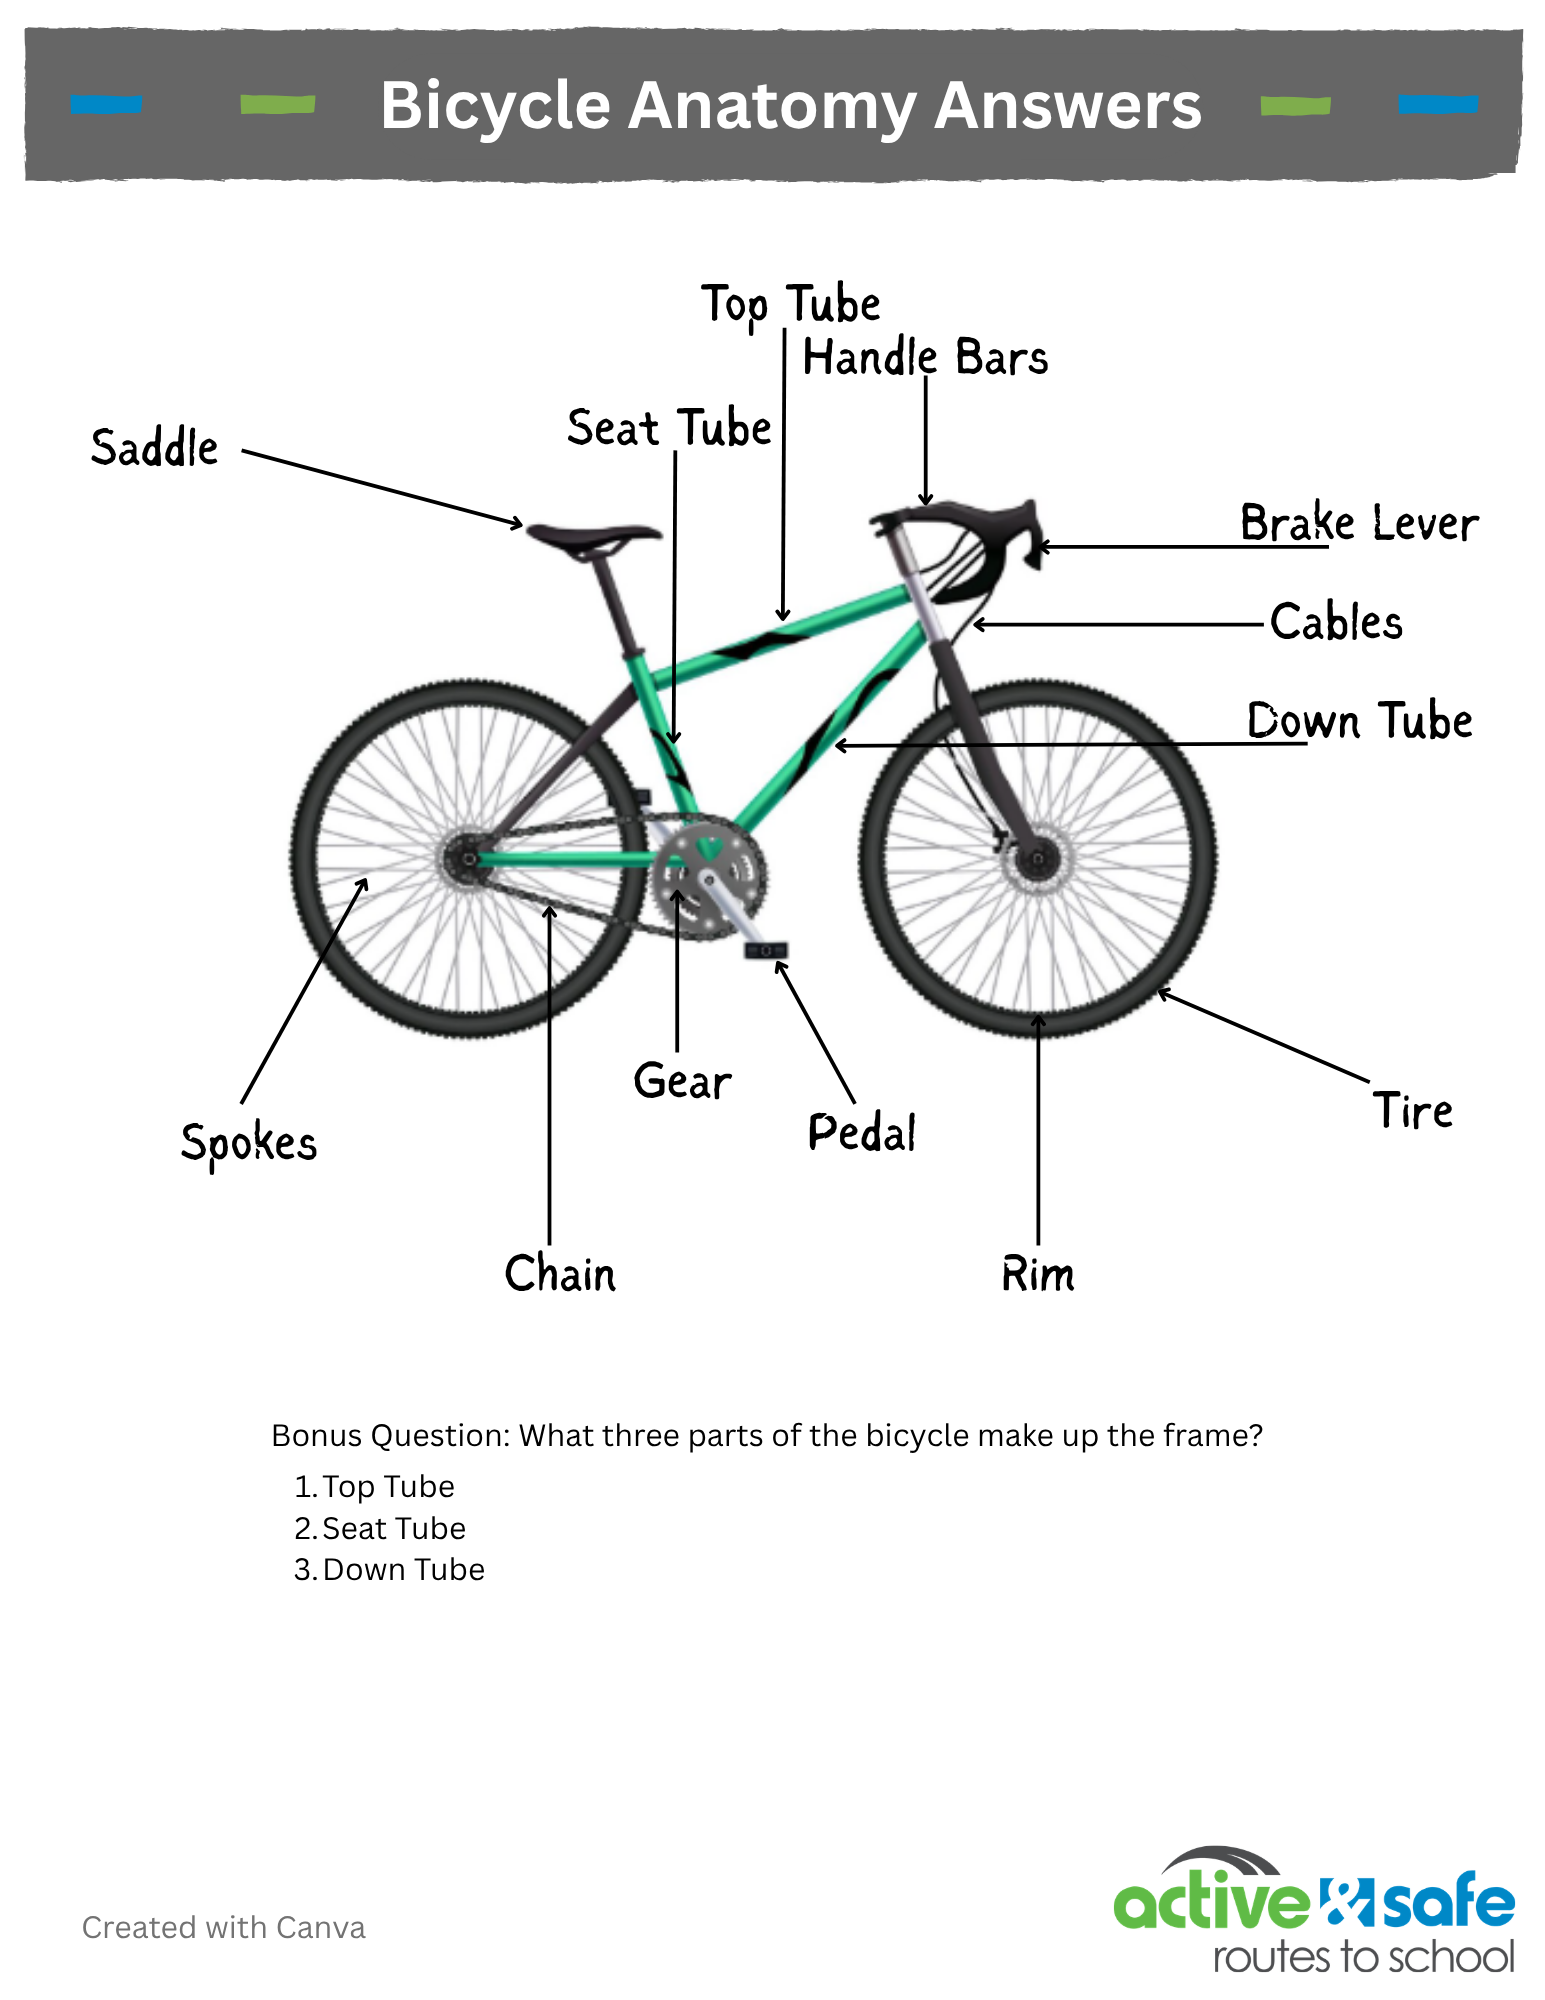
Bicycle Anatomy
Some important parts of a bicycle include the frame, brakes, handlebars, wheels, and chain.
- The frame is the main structure that holds the bike together
- The brakes help you stop safely
- The handlebars help you steer and control the bike
- The wheels and tires allow the bike to move smoothly
- The chain and pedals help power the bike forward.
Bike Fit
A properly fitted bike makes riding safer and more comfortable.
A bike should:
- Allow you to stand over the frame with a small gap
- Have a seat height where your leg is almost straight at the bottom of the pedal
- Have handlebars positioned so you can ride comfortably and maintain control
Resources
Bike Anatomy & Fit Lesson Plan
This lesson teaches students about the important parts of a bicycle and how a bicycle should properly fit the rider to ensure safe and comfortable cycling.
Know Your Bike PowerPoint Presentation
The PowerPoint teaches students about the main parts of a bicycle and explains how a bike should be adjusted to fit the rider safely and comfortably. It introduces key bicycle components as well as basic bike fitting concepts such as frame size, seat height, and handlebar position.
Bicycle Anatomy Worksheet
These activities help students apply what they have learned. Students can complete a Bicycle Anatomy worksheet where they match the names of bike parts to a diagram. | Bike Anatomy Worksheet Answers
Bike Fit Quiz
Alternatively, students can participate in a Bike Fit Quiz where they identify problems in images of cyclists and suggest how to fix them. These activities help reinforce understanding and build confidence in recognizing safe bike setup.
Flat Fix and Chain Tricks
Knowing how to fix small bike problems can help you stay safe and get back on the road quickly. Flat tires and fallen chains are two common issues cyclists experience. Learning simple repair skills helps riders feel more confident and independent when something goes wrong.
Fixing a Flat Tire
A flat tire usually happens when the inner tube gets a hole and loses air.
To fix a flat tire:
- Remove the wheel and take the tube out of the tire
- Find the hole by listening or feeling for air
- Patch the hole or replace the tube
- Put the tire back together and inflate it
Fixing a Fallen Chain
Sometimes the bike chain can slip off the gears while riding.
To fix a fallen chain:
- Place the chain back onto the front chainring or rear gear
- Slowly turn the pedals to guide the chain into place
- Continue pedaling until the chain moves smoothly
Resources
Flat Fix and Chain Tricks Lesson Plan
This lesson introduces students to two common bicycle problems: flat tires and chains that fall off the gears. Students will learn the basic steps for repairing a flat tire and getting the chain back onto a gear. The lesson include a presentation and video.
Flat Fix and Chain Tricks PowerPoint Presentation
This PowerPoint introduces students to two common bike problems: flat tires and chains that fall off. It teaches the basic steps for fixing a flat tire, putting a chain back on, and checking that the bike is safe to ride again. Students are also introduced to the ABCs safety check to help them remember what to inspect before riding: Air, Brakes, and Chain.
Flat Tire Repair Video
Learn how to fix a flat bike tire step by step. This video shows what tools you need, how to find the leak, and how to patch the inner tube. You’ll also learn how to safely take the tire apart, check for sharp objects, and put everything back together so you can get riding again.
Social Media
Utilize these social media resources to share some of the activities your classes are doing with your school community.